Astrophotography can be particularly challenging at times, with so many variables and potential problems to consider. Ensuring you can keep your stars round is key to producing stunning images of the night sky. Not only are round stars aesthetically pleasing they are also a sign that you are getting the most out of your set up. Here’s a few tips and tricks that should help you round up your stars.
1. Oblong Stars?
Oblong stars across the field can be due to poor guiding in one axis. If possible check your tracking correction graph. If it’s oscillating between + and – corrections you’ll need to turn down the aggressiveness. If it’s taking several cycles to make a full correction you’ll want to turn the aggressiveness up.
2. Polar Aligned Mount?
If you’re using a polar aligned mount you could try turning off the guiding for the DEC axis. While not being a perfect fix for all problems you may find this removes any issues you are facing.
- 4 panel mosaic with Skywatcher ED80. HEQ5 mount.
- SKywatcher 250px. RGB image.
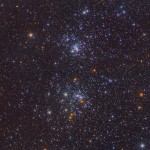
Well rounded stars give your image a crisp, professional look that we are all aiming for when imaging
3. Zooming In?
It’s easy to get lost in your images, try to make sure you don’t spend so much time zoomed into the corners of your images. You might forget to zoom out and take in the whole image!
4. Slight Distortion?
Sometimes stars can have a good shape in one part of the image but they get increasingly distorted away from this spot. This might be a sign that you need to collimate the optics.
5. Stars With Tails?
It’s common for people to find their stars have little “tails”. This can be caused by your mount not having enough time to settle between exposures. This can be especially true if you are dithering. A simple adjustment to the amount of time you give your mount between exposures should fix this problem.
6. Want Improved Resolution?
Want to improve the resolution across your image? Try adding a deconvolution filter as part of your processing. They take a while to get the hang of but they can significantly improve the resolution across your image.
Distorted stars can leave your image looking rushed and poor quality
7. Misshapen Stars?
If you find the stars at the edge of field are misshapen then it might be because you are using a sensor that is too large for your optics. Try a field flattener lens, it should help bring them back to a realistic shape.
8. Trailed?
If your tracking looks good but your stars are trailed then you might be seeing differential flexure between the main imaging scope and the guide scope. Moving to an off axis guider will eliminate this.
9. Demanding Setup?
A lot of astrophotography setups can be very demanding. Try using small sensors with big pixels, they are a lot less demanding and one of the reasons we see so many great 314/414 images.
10. Tilt In Your Optics?
If the stars in the corners are misshapen and look different in each corner you may be experiencing tilt in your optics. All you need to do is check your collimation, the flexure in adaptors and focuser. Then replace draw tube adaptors for screw fit.
We hope these tips can help you get the most out of your setup and lead to some stunning images. Our dedicated support team are always available to offer in-depth advice and if your looking for more tips and tricks we’ve got some for colourful stars here and guiding tips here.
Got any tips you think we’ve missed? Let us know in the comments below.


